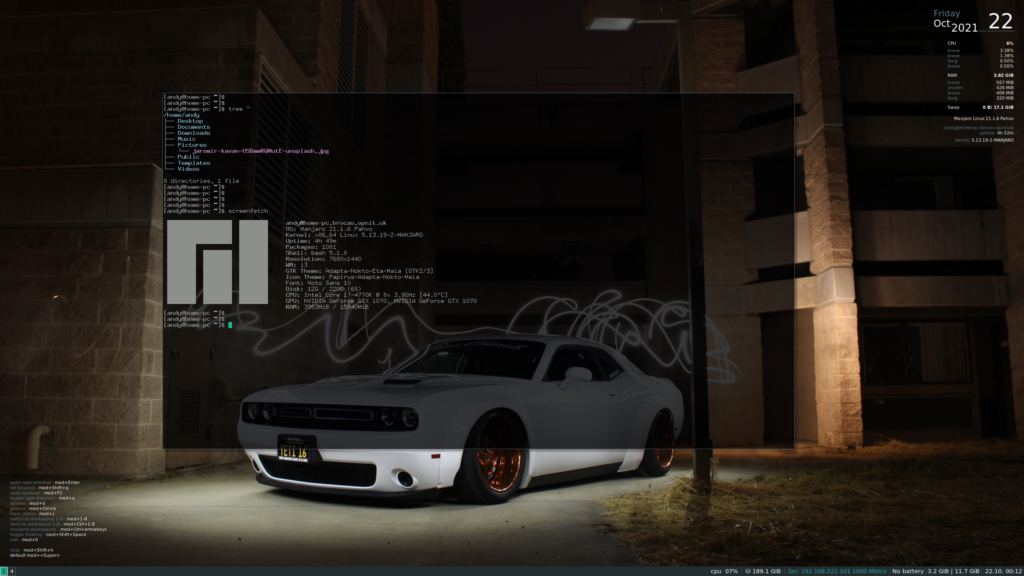
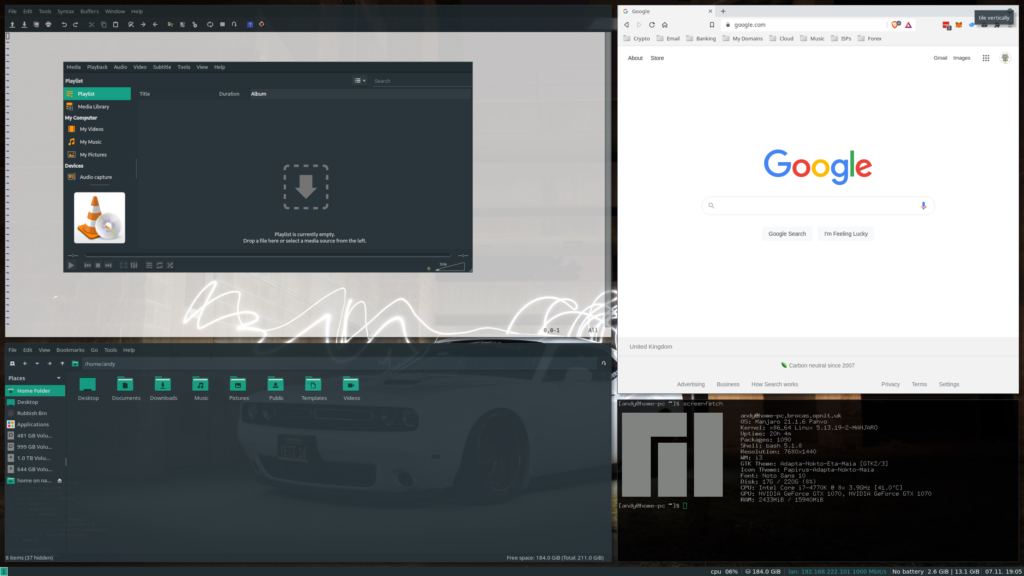
i3 does not support compositing and true transparency is achieved using picom – a standalone compositor for Xorg. This is already installed and running on my system at start-up:
[andy@home-pc ~]$ grep picom ~/.i3/config
bindsym $mod+t exec --no-startup-id pkill picom
bindsym $mod+Ctrl+t exec --no-startup-id picom -b
exec --no-startup-id nitrogen --restore; sleep 1; picom -b
Here we can see that i3 starts picom as a background process (-b option) at start-up. We can also see the the default configuration allows us to easily disable (mod+t) and re-enable (mod+ctrl+t) transparency. This is useful if you need to quickly turn it off because its distracting in its current configuration for a particular window.
Terminal – urxvt
The default terminal on Manjaro is urxvt, and transparency can be achieved in two ways, either using “true” transparency or “fake” transparency.
True Transparency
To enable transparency in urxvt, edit the ~/.Xresources configuration file.
[andy@home-pc ~]$ vim ~/.Xresources
First make sure the below line is present and not commented-out.
URxvt.depth: 32
And change the URxvt.background variable from (in my case):
URxvt.background: [100]#222D31
To something like the below.
URxvt.background: rgba:[85]#000002
This sets the opacity level to 85% with a background colour of ‘#000002‘ (black).
To load the new changes, run the following and then start a new terminal. It will not adjust the transparency on already open terminal windows.
[andy@home-pc ~]$ xrdb ~/.Xresources
Fake Transparency
If you need to use fake transparency for some reason, make sure the above entries are commented-out and replaced with the below two.
URxvt*transparent:              true
URxvt*shading:                  138
! URxvt.depth:                      32
! URxvt.background:                 [100]#222D31
To load the new changes, run the following:
[andy@home-pc ~]$ xrdb ~/.Xresources
You should now have transparency in your urxvt terminal.

Per-Application Transparency
I also want to apply transparency to other applications as well. However the transparency I want to apply might depend on the application. For example, having the transparency set to 75% for a web browser would no doubt be too distracting. Using the official Arch Linux guide on per-application transparency, we can use devilspie and transset-df along with the already installed picom in place of xcompmgr.
We need to install transset-df (from the AUR) and devilspie.
[andy@home-pc ~]$ pamac install devilspie
And to install transset-df from the repository with Manjaro.
[andy@home-pc ~]$ pamac build transset-df
The per-application setting are controlled by devilspie. Create a configuration file for the settings.
[andy@home-pc ~]$ mkdir -v ~/.devilspie
mkdir: created directory '/home/andy/.devilspie'
Create a new file in that directory with a file extension of .ds. You could create a new configuration file for each application if you want. For now, I’m just going to use two files. One for applications with 75% transparency, and anther with 95%.
[andy@home-pc ~]$ tree .devilspie/
.devilspie/
├── opacity_75.ds
├── opacity_95.ds
Create one with 75% transparency.
[andy@home-pc ~]$ vim ~/.devilspie/opacity_75.ds
My one looks like:
( if
( or
( contains ( window_class ) "Gvim" )
( contains ( application_name ) "shutter" )
( contains ( application_name ) "Spotify" )
)
( begin
( spawn_async (str "transset-df -i " (window_xid) " 0.75" ))
)
)
And create another one with 95% transparency.
[andy@home-pc ~]$ vim ~/.devilspie/opacity_95.ds
Which looks like the below. Note I don’t apply transparency to vlc or web browsers as I find it too distracting.
( if
( or
( contains ( window_class ) "Arandr" )
( contains ( window_class ) "Spicy" )
( contains ( window_class ) "Tor Browser" )
( contains ( window_class ) "qBittorrent" )
( contains ( window_class ) "Pcmanfm" )
)
( begin
( spawn_async (str "transset-df -i " (window_xid) " 0.95" ))
)
)
To find the names of the window class you need, run the following command and then open the window you need. For example, you can see that the Brave browser has the window class name of “Brave-browser” should you want to add transparency to that.
[andy@home-pc ~]$ devilspie -a
Window Title: 'andy@home-pc:~'; Application Name: 'andy@home-pc:~'; Class: 'URxvt'; Geometry: 2560x1416+5120+0
Window Title: 'andy@home-pc:~'; Application Name: 'andy@home-pc:~'; Class: 'URxvt'; Geometry: 1259x687+3848+716
Window Title: 'Per-application transparency - ArchWiki - Brave'; Application Name: 'Per-application transparency - ArchWiki - Brave'; Class: 'Brave-browser'; Geometry: 1259x687+3848+13
Window Title: 'Edit Post ? pikedom.com ? WordPress - Brave'; Application Name: 'Edit Post ? pikedom.com ? WordPress - Brave'; Class: 'Brave-browser'; Geometry: 1259x1390+2573+13
Window Title: 'Async Price Data Load with aiohttp and asyncpg - YouTube - Brave'; Application Name: 'Async Price Data Load with aiohttp and asyncpg - YouTube - Brave'; Class: 'Brave-browser'; Geometry: 2560x1440+0+0
For this to work, you need to make sure the picom process is running. This was already pre-configured on Manjaro i3 CE.
[andy@home-pc ~]$ grep picom ~/.i3/config
bindsym $mod+t exec --no-startup-id pkill picom
bindsym $mod+Ctrl+t exec --no-startup-id picom -b
exec --no-startup-id nitrogen --restore; sleep 1; picom -b
But you will also need to start devilspie.
[andy@home-pc ~]$ grep devil ~/.i3/config
exec --no-startup-id devilspie -a
Now when you reload your i3 config, the transparency should work.

Don’t forget that you can toggle the transparency on or off with mod+t and mod+Ctrl+t.
Be the first to comment