If your just getting started with AWS, one of the first things you will likely want to do is quickly create an EC2 instance. In order to do that however, you will need to create a Virtual Private Cloud (VPC) and attach it to an Internet Gateway. Here we demonstrate how to do that.
See my new article is your more interested in creating a VPC, subnet and EC2 instance using the AWS CLI.
Contents
Create a VPC
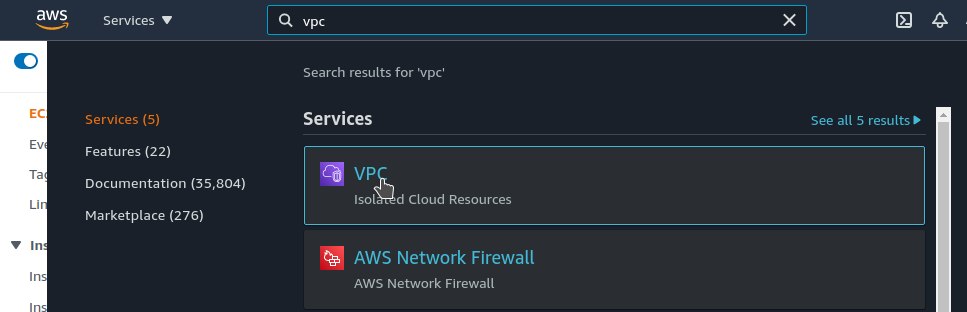
Search for a select VPC from the menu.
Click on Create VPC and fill out the below form.
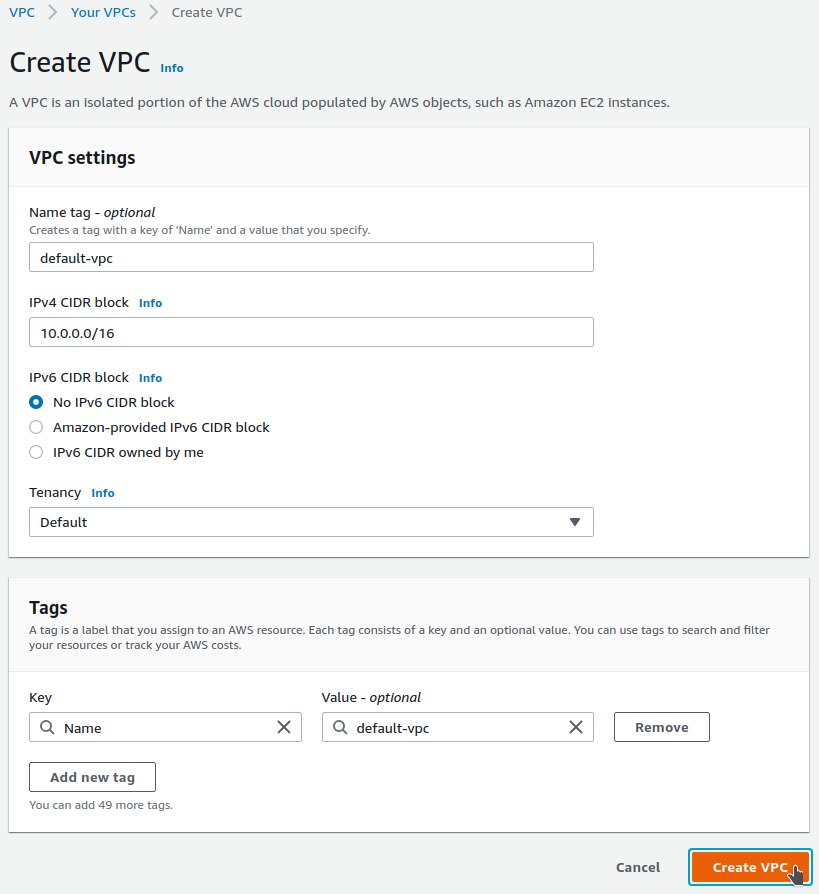
All our EC2 instances will have a 10.0.x.x private IP address. This is a /16 subnet. You can use lipcalc to work this out for you if you wish.
[andy@home-pc ~]$ sipcalc 10.0.0.0/16
-[ipv4 : 10.0.0.0/16] - 0

[CIDR]
Host address		- 10.0.0.0
Host address (decimal)	- 167772160
Host address (hex)	- A000000
Network address		- 10.0.0.0
Network mask		- 255.255.0.0
Network mask (bits)	- 16
Network mask (hex)	- FFFF0000
Broadcast address	- 10.0.255.255
Cisco wildcard		- 0.0.255.255
Addresses in network	- 65536
Network range		- 10.0.0.0 - 10.0.255.255
Usable range		- 10.0.0.1 - 10.0.255.254

-
Create a Subnet

Now we need to create a subnet within our VPC; select Subnets from the menu on the left.
The IPv4 CIDR block can either be the same as the VPC or a portioned off segment.
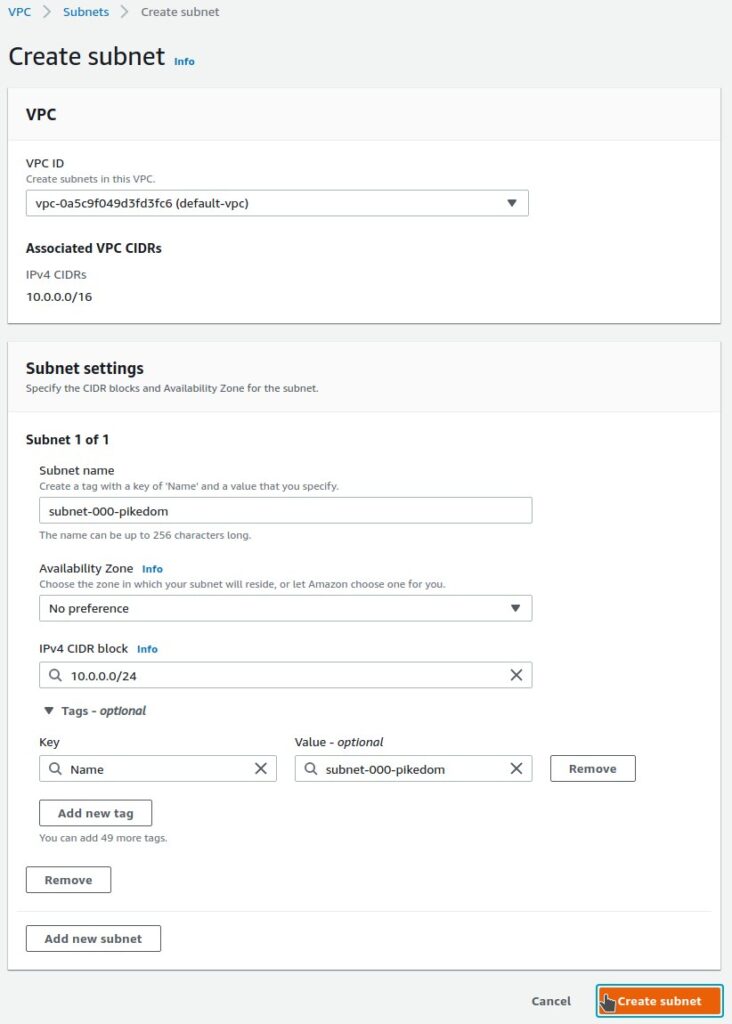
This will give me 254 usable addresses in the 10.0.0.x range.
[andy@home-pc ~]$ sipcalc 10.0.0.0/24
-[ipv4 : 10.0.0.0/24] - 0

[CIDR]
Host address		- 10.0.0.0
Host address (decimal)	- 167772160
Host address (hex)	- A000000
Network address		- 10.0.0.0
Network mask		- 255.255.255.0
Network mask (bits)	- 24
Network mask (hex)	- FFFFFF00
Broadcast address	- 10.0.0.255
Cisco wildcard		- 0.0.0.255
Addresses in network	- 256
Network range		- 10.0.0.0 - 10.0.0.255
Usable range		- 10.0.0.1 - 10.0.0.254

-
Again – sipcalc can really save you some time!
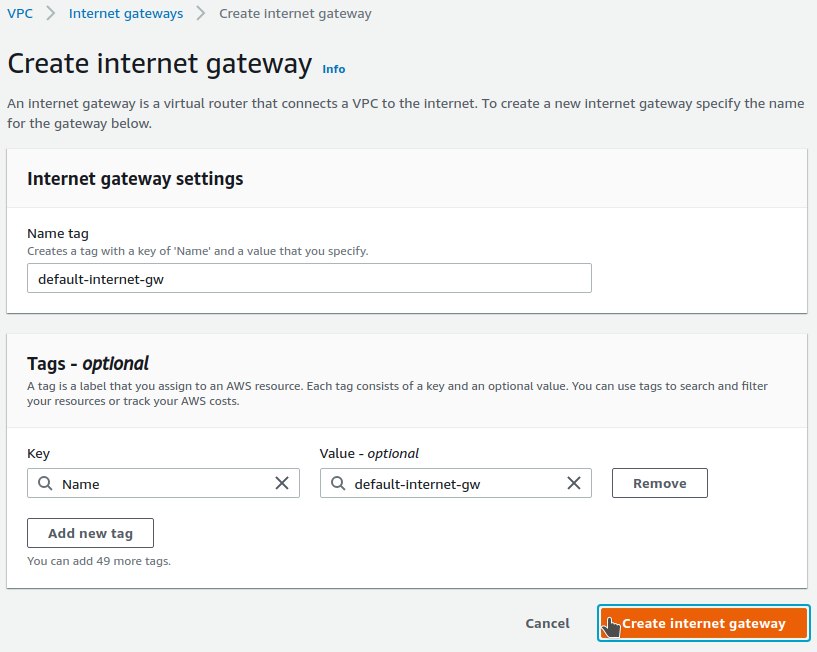
Create an Internet Gateway
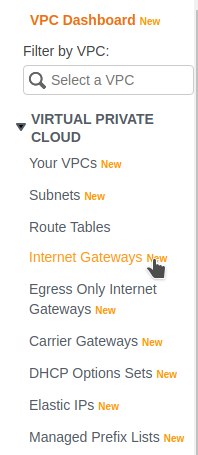
Now we need to create an Internet Gateway and attach it to our VPC. Within the Virtual Private Cloud section, click on Internet Gateway from the menu on the left.
Just give it a name and Create the internet gateway.
Select Attach to VPC from the Actions menu.

Select the VPC you created earlier.

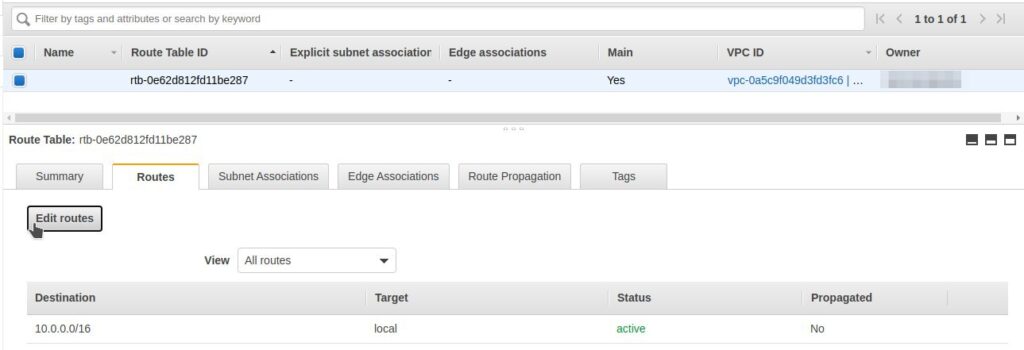
Add a Default Route to the Internet
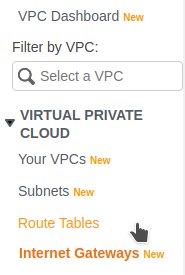
We need to create a route in the routing table that points all traffic out to the internet. To do this, select Route Tables from the menu on the left.
Select the default route and click Edit routes with the Routes tab.
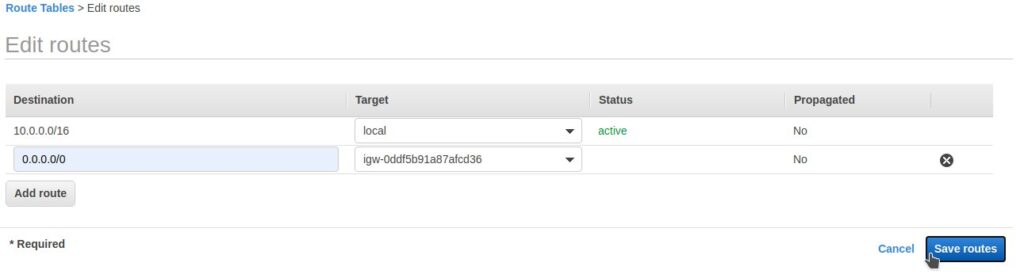
Click Add route and enter 0.0.0.0/0 for destination, and the Internet Gateway for the target. The click Save routes.
That’s basically it! You should now be able to create an EC2 instance.
Create an EC2 Instance
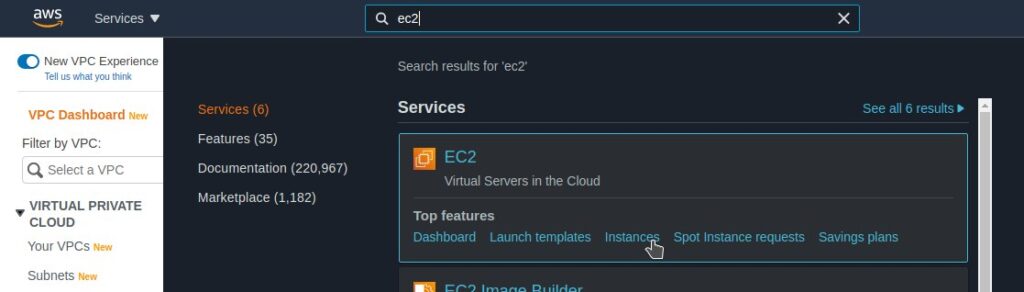
Search for EC2 and select Instances.
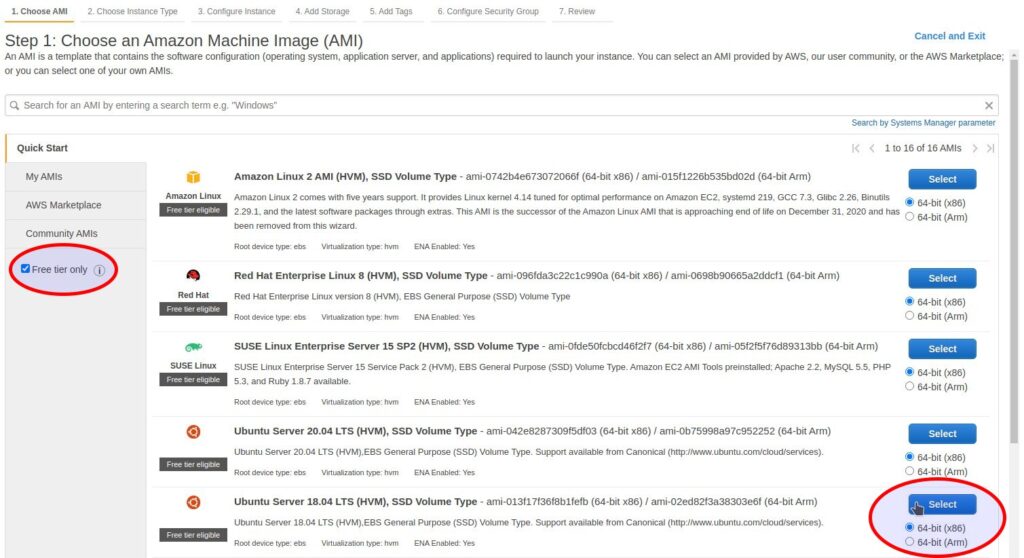
Click on Launch instances. and select an (AMI) image to install. I’m only interested in the free tier right now so ticked that checkbox. In this example, I select Ubuntu 18.04.
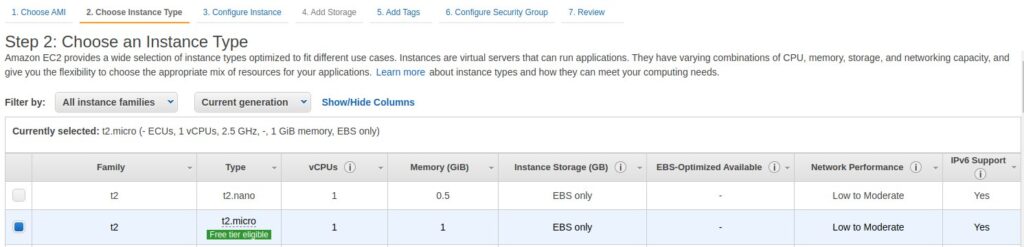
And because its in the free tier, I selected a t2.micro.
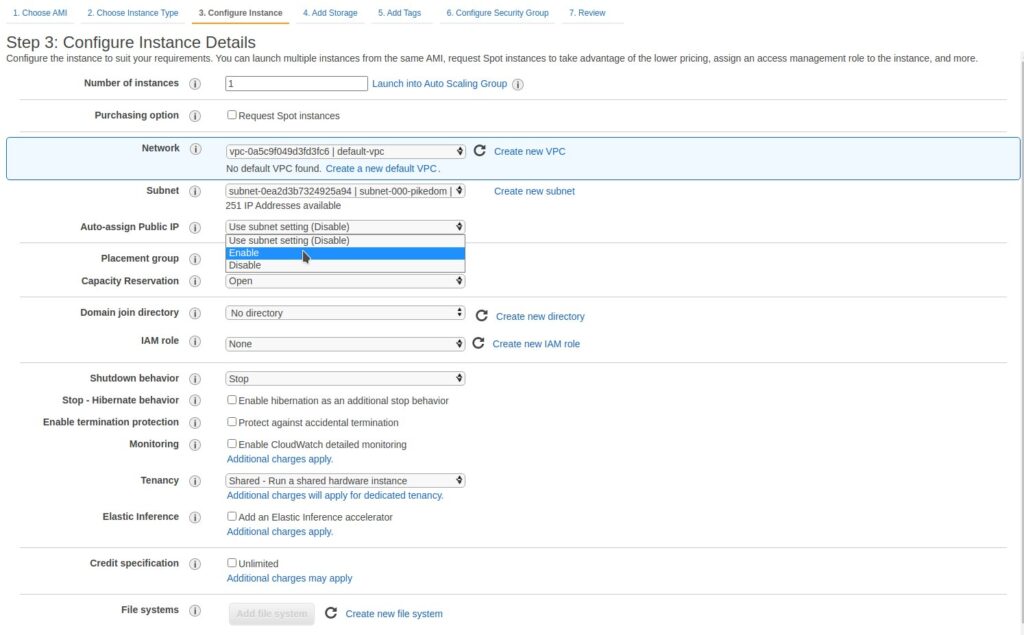
On the next page, make sure to select Enable for Auto-assign Public IP.
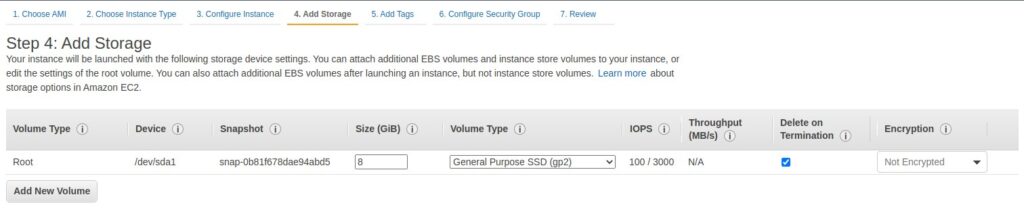
Accept the defaults.
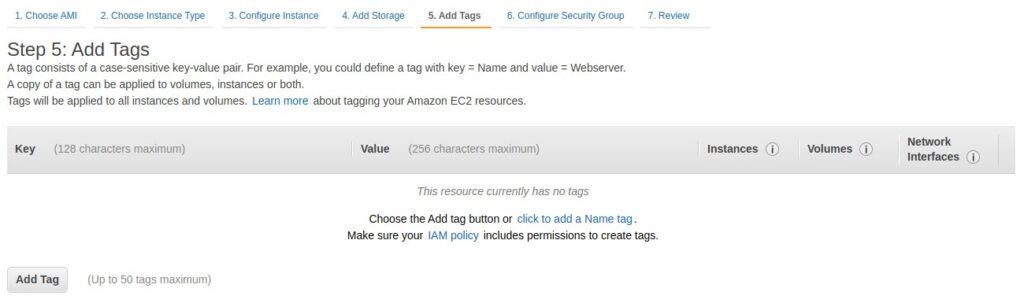
You can add tags later.
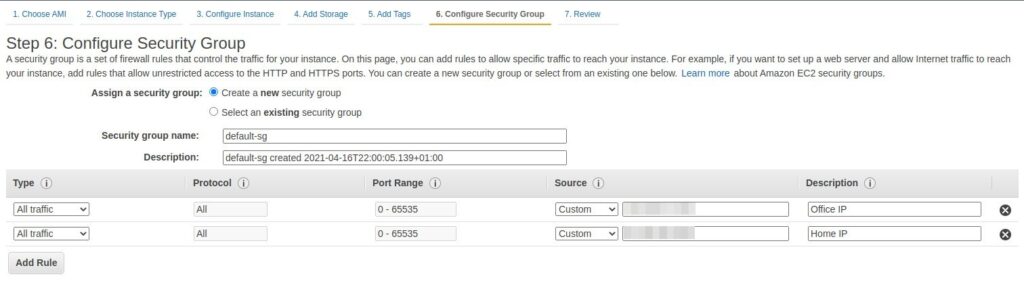
Create a new security group with at least SSH enabled. You might want to lock down SSH access based on IP. For example, if you have public IP, add that address here to make sure only traffic coming from your IP has access to it.
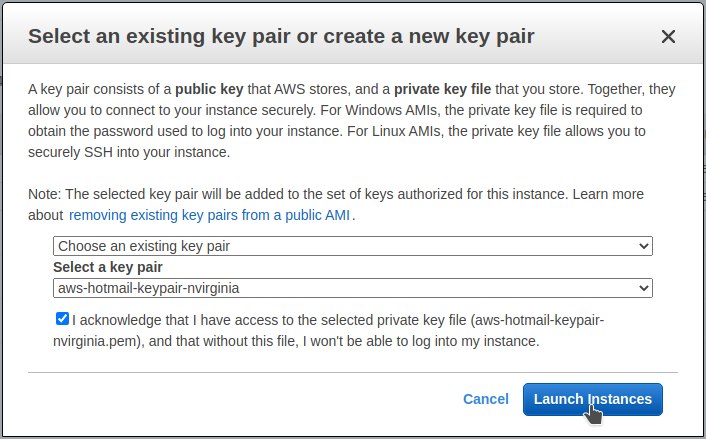
Click Review and Launch, and then Launch. Create and download a new keypair if you don’t already have one. If you do, select that one.
And that’s it! You should now be able to access your server via SSH with.
[andy@home-pc ~]$ ssh -i Documents/AWS/aws-hotmail-keypair-nvirginia.pem [email protected] -p22
That’s about it!
Be the first to comment