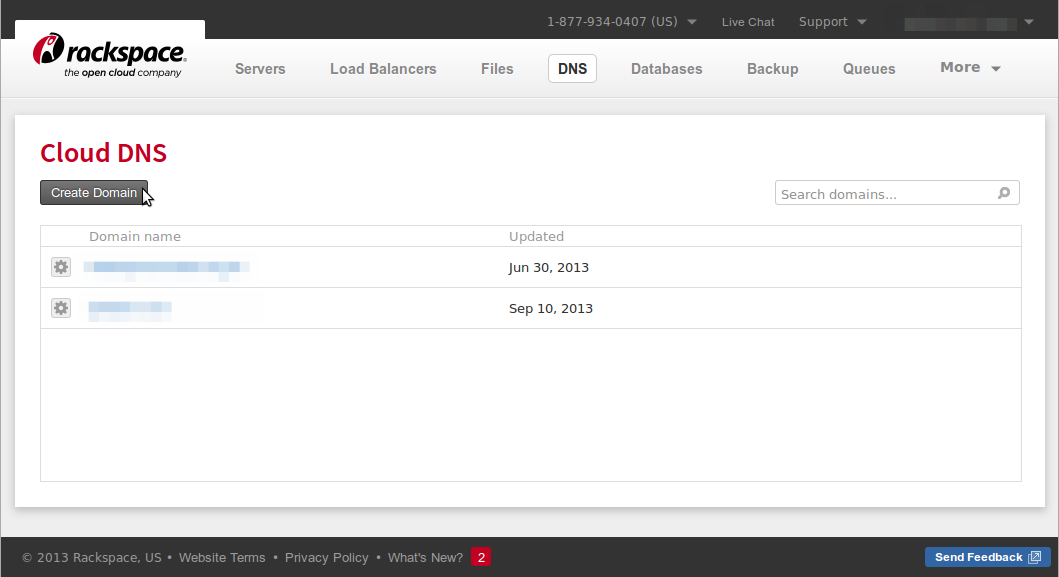
Rackspace provides a great easy to use tool for managing your DNS.
The first thing you need to do is create a zone file for the domain you want to manage. To do this, first log into the mycloud.rackspace.co.uk customer portal and navigate to the DNS tab at the top of the page.
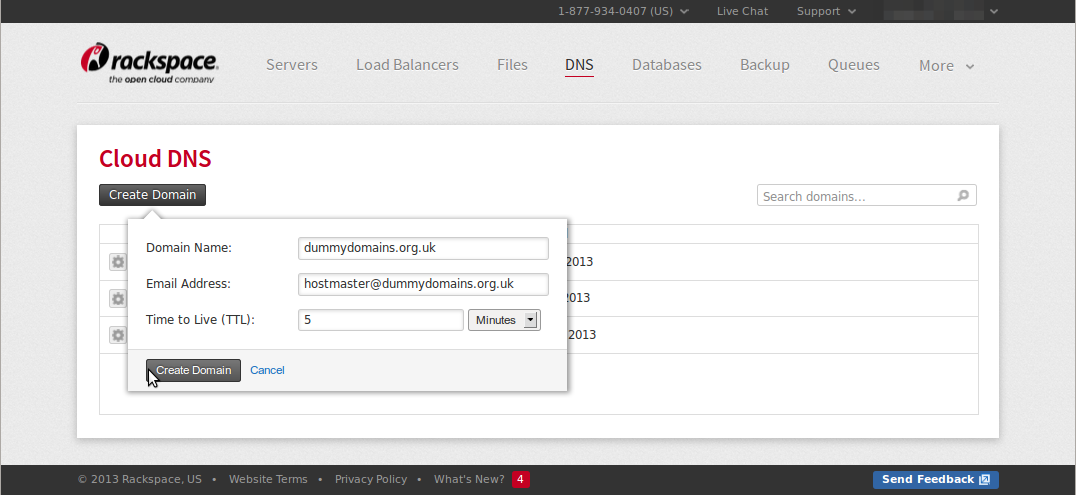
Click on “Create Domain” and fill out the details from the drop-down menu.
Click on “Create Domain” to create the zone file.
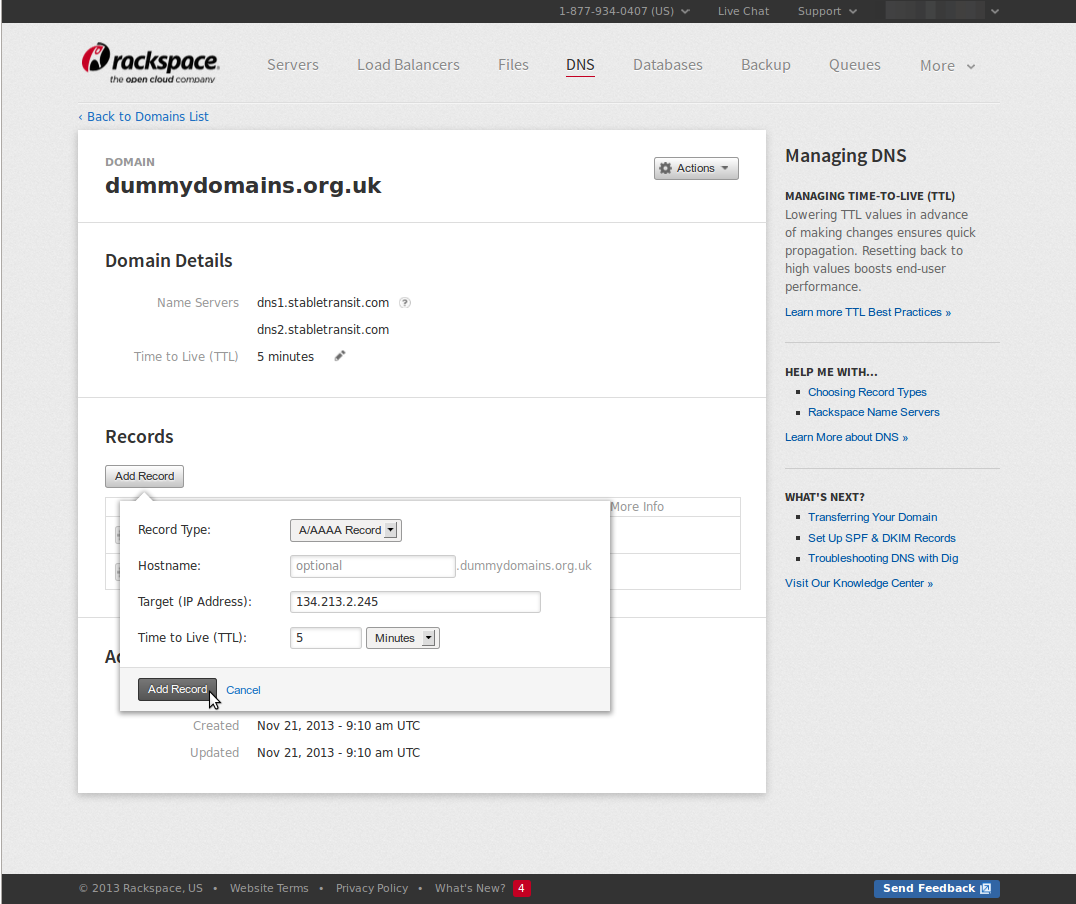
Now we need to add some DNS records to the zone file. Here I add an A record so the domain dummydomains.org.uk resolves to the IP 162.13.144.164.
The last thing we need to do is make sure the Rackspace name servers are authoritative for our domain. To do this, you will need to make contact with whoever you lease the domain name through. I bought my domain name through fasthosts.co.uk; normally you will just need to log onto the control panel provided by your DNS registrar and set the DNS name servers for the domain in question to the below.
dns1.stabletransit.com

dns2.stabletransit.com
Job done!
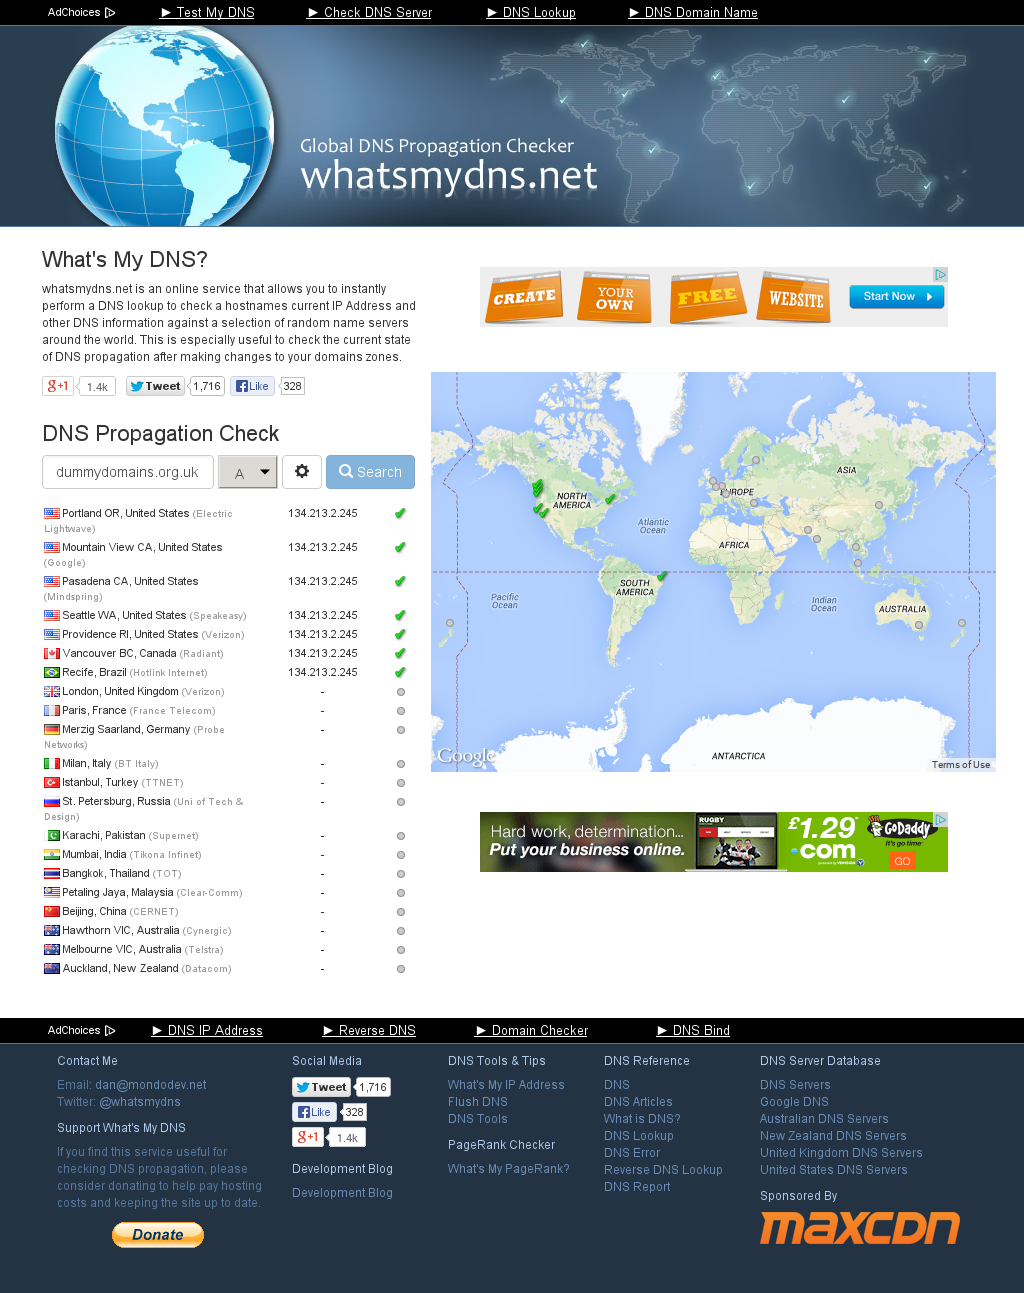
You can check to see how your DNS changes propagate around the world using the below website.
Be the first to comment