
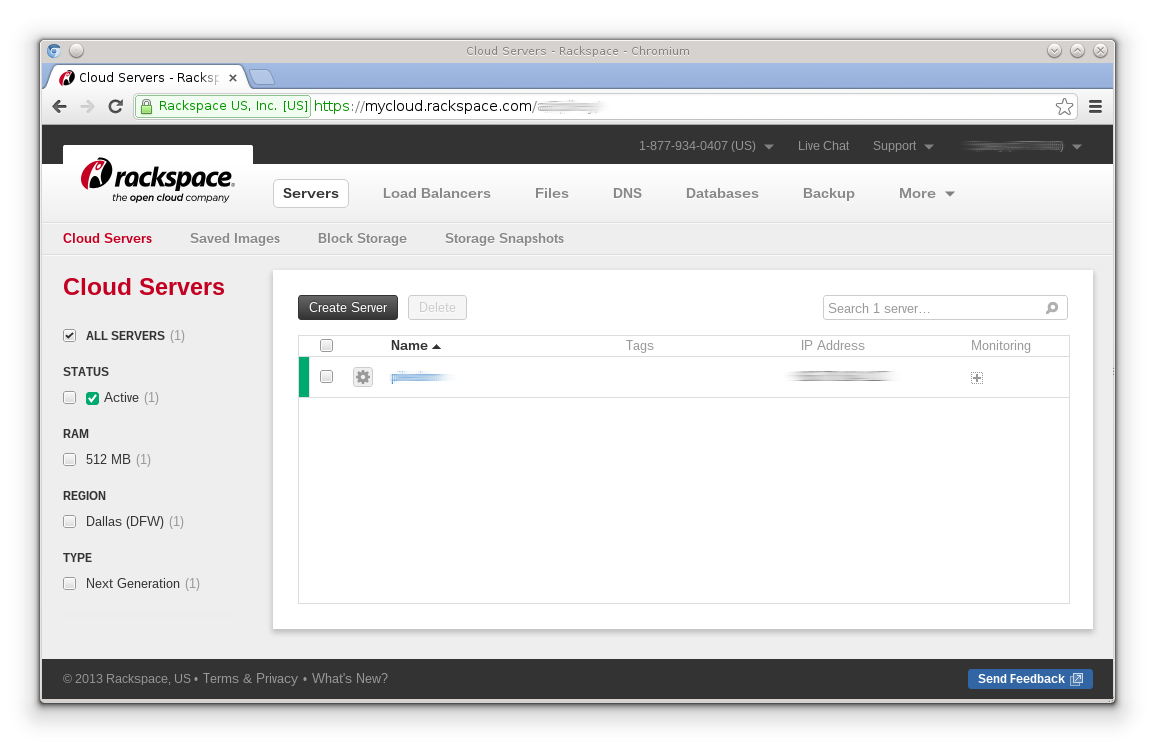
Assuming you’ve already created yourself a Rackspace cloud account and that you’ve just logged in, you will see a list of cloud servers (if you have any yet). These are your current servers. If a server is listed here, you will be getting charged for it at an hourly rate. Even if you shutdown your server through the Operating System! To avoid getting charged for something you are not using, take a snapshot and then delete it. You can always build a new server instance from that snapshot at a later point in time when it is required.
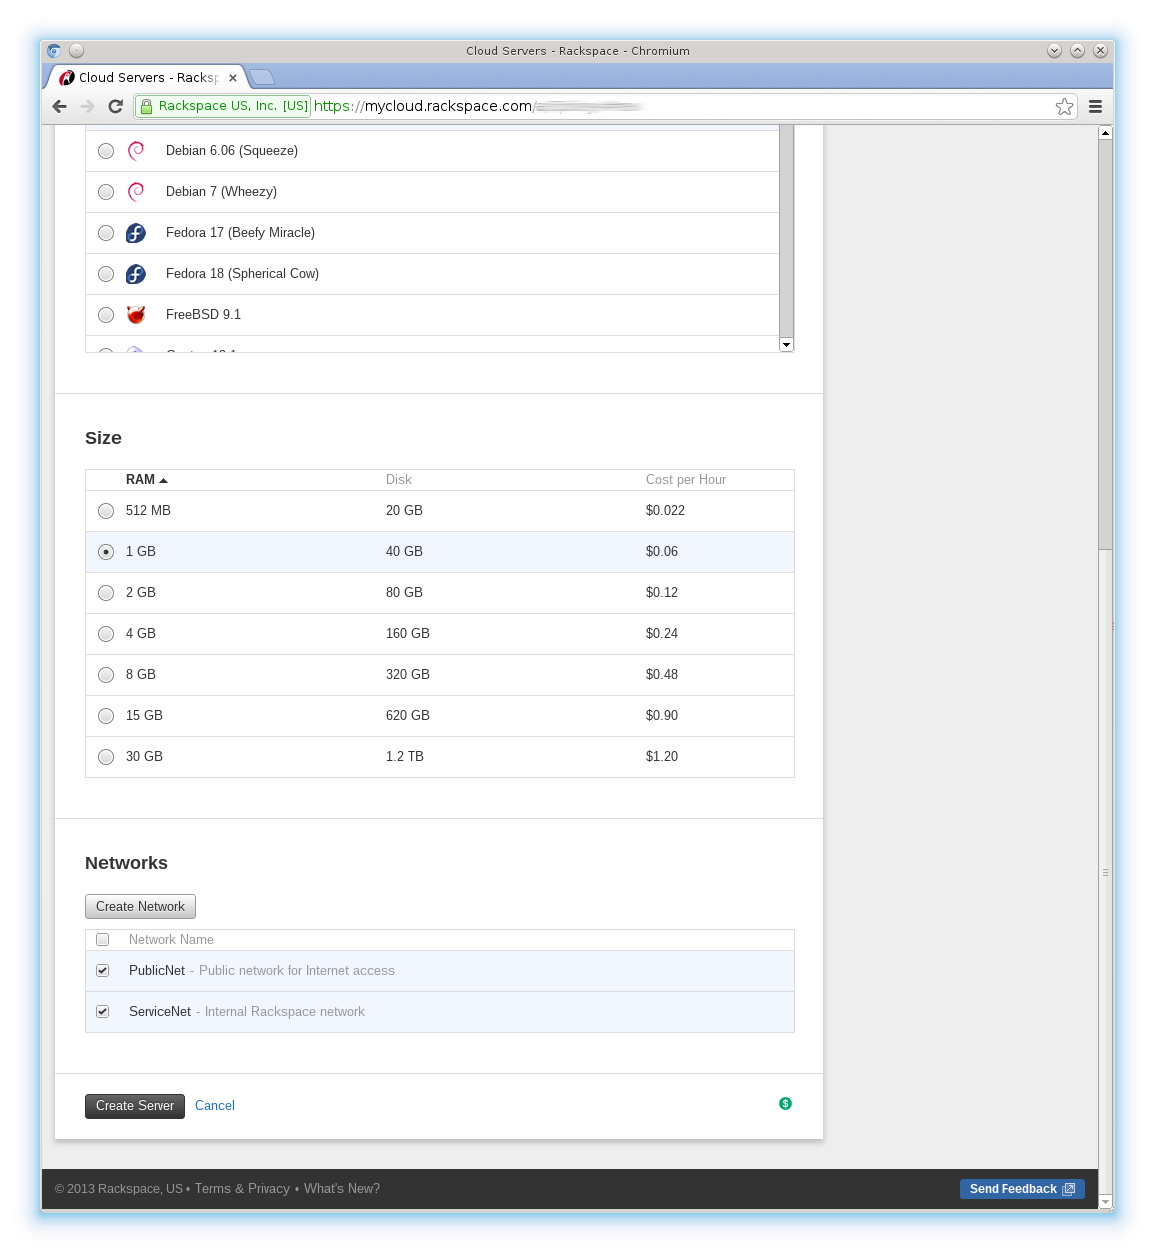
To create a new server, you simply click “create server“, then provide the following information.
Server name:
Region:
Image:
Size:
Networks:
Once filled out, kick the build process off by clicking “create server” at the bottom of the page.
The server will then go into “building” state until complete when it then goes into “active". Although it only takes a few minutes to be deployed, you are free to continue using other parts of the website. You can even spin up more servers while you wait if you want!!

And that is it! Your first cloud server! Easy!
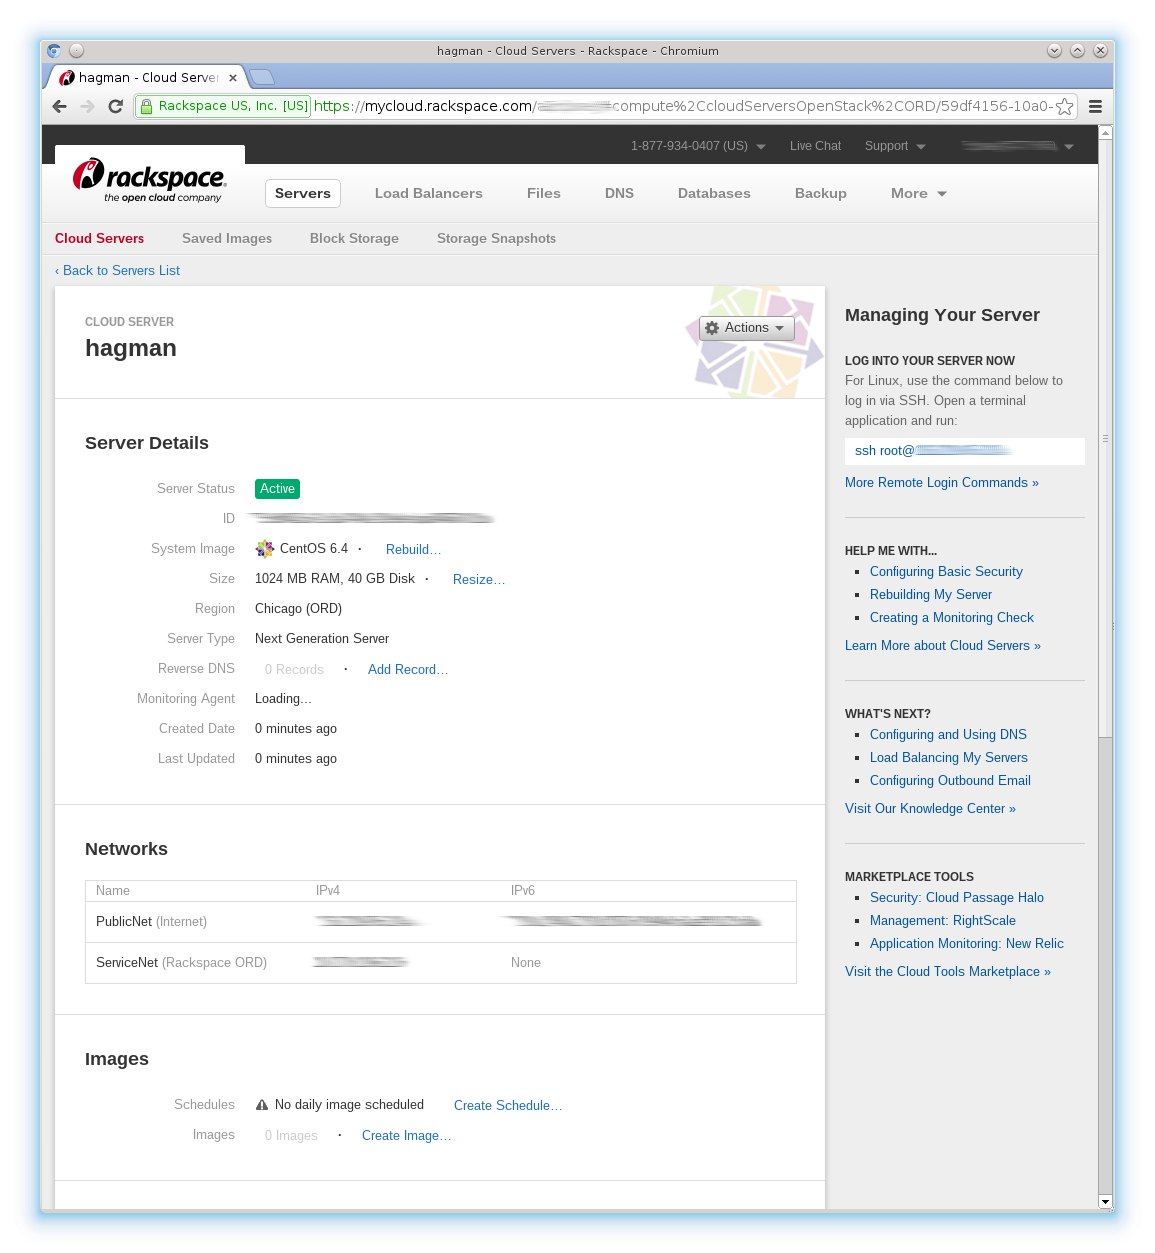
How to connect to your new cloud server depends on what Operating System you chose to install, Windows or Linux? If you chose Linux, you will need to use SSH. If Windows, you can use RDP. Here we chose CentOS – which is essentially just a free, re-branded release of Red Hat Enterprise Linux. If using SSH, issue below command.
[root@server ~]# ssh [email protected]
Don’t forget to replace 1.2.3.4 with the public IP address of your cloud server!

Be the first to comment